Concord Cabinet Wine

If the thought of making your own homemade wine seems intimidating, you’d be wrong…
It’s easier than you think.
I’ve committed a MURDER! I murdered these beautiful grapes and murdered the fine art of winemaking, in one fell swoop. Who knew I had it in me, to destroy both the beauty of nature and the art of vinification? Ok, ok, so maybe I’m being a little dramatic but it is true this isn’t your typical winemaking process. This is a very rough, down to earth, getting back to basics type of wine. If we were in an apocalyptic scenario and all the liquor stores instantly became obsolete, for like forever; then this process will give you the rough knowledge to produce a very drinkable and delicious libation. Come on, the fact that it’s called “cabinet” wine really should say it all.
It’s a very simple process and the knowledge has been passed down to me, from my grandfather, who was a rather rough and tumble kind of winemaker (the man would fortify his wine with Everclear for good measure, just to give you a good picture). No matter what he added to his wines he always explained the fermentation process, in depth, to little old fourteen year old me. He probably thought I wasn’t even listening because well, I was a teenager and that’s what they do, but I did and I listened very well. I just never put my knowledge to use until now. I could have been the only teenager in my high school who could have made homemade wine and been cool in high school but no that wasn’t me, I was the good girl. Seriously, what a waste, I’m a fool! Hem., well anyway let’s get back on track. So I decided to take my dusty knowledge from my brain and apply it to some fresh Concord Grapes that I acquired at my local farmer’s market. This wine was a personal triumph for me. I made my own wine from naturally acquired yeast from knowledge that I had kept squirreled away for nearly 20 years. It made me proud to not let my knowledge go to waste and even more so I proved that I was actually listening to my grandfather. I just wish I could share it with him and show him my achievement. But in a way I know he would be proud of me. Every time I take a sip I can think of him and inside I thank him for teaching me such a unique skill. I can still hear his words; “Trinnie, the only things that are required are some fresh grapes, sugar, water and time. Let mother nature do the rest.”
Concord Cabinet Wine
3 cups of Concord Grapes
½ cup granulated sugar
Filtered Water
Wide mouth Quart Mason Jar
Cheesecloth
Funnel
Coffee Filter

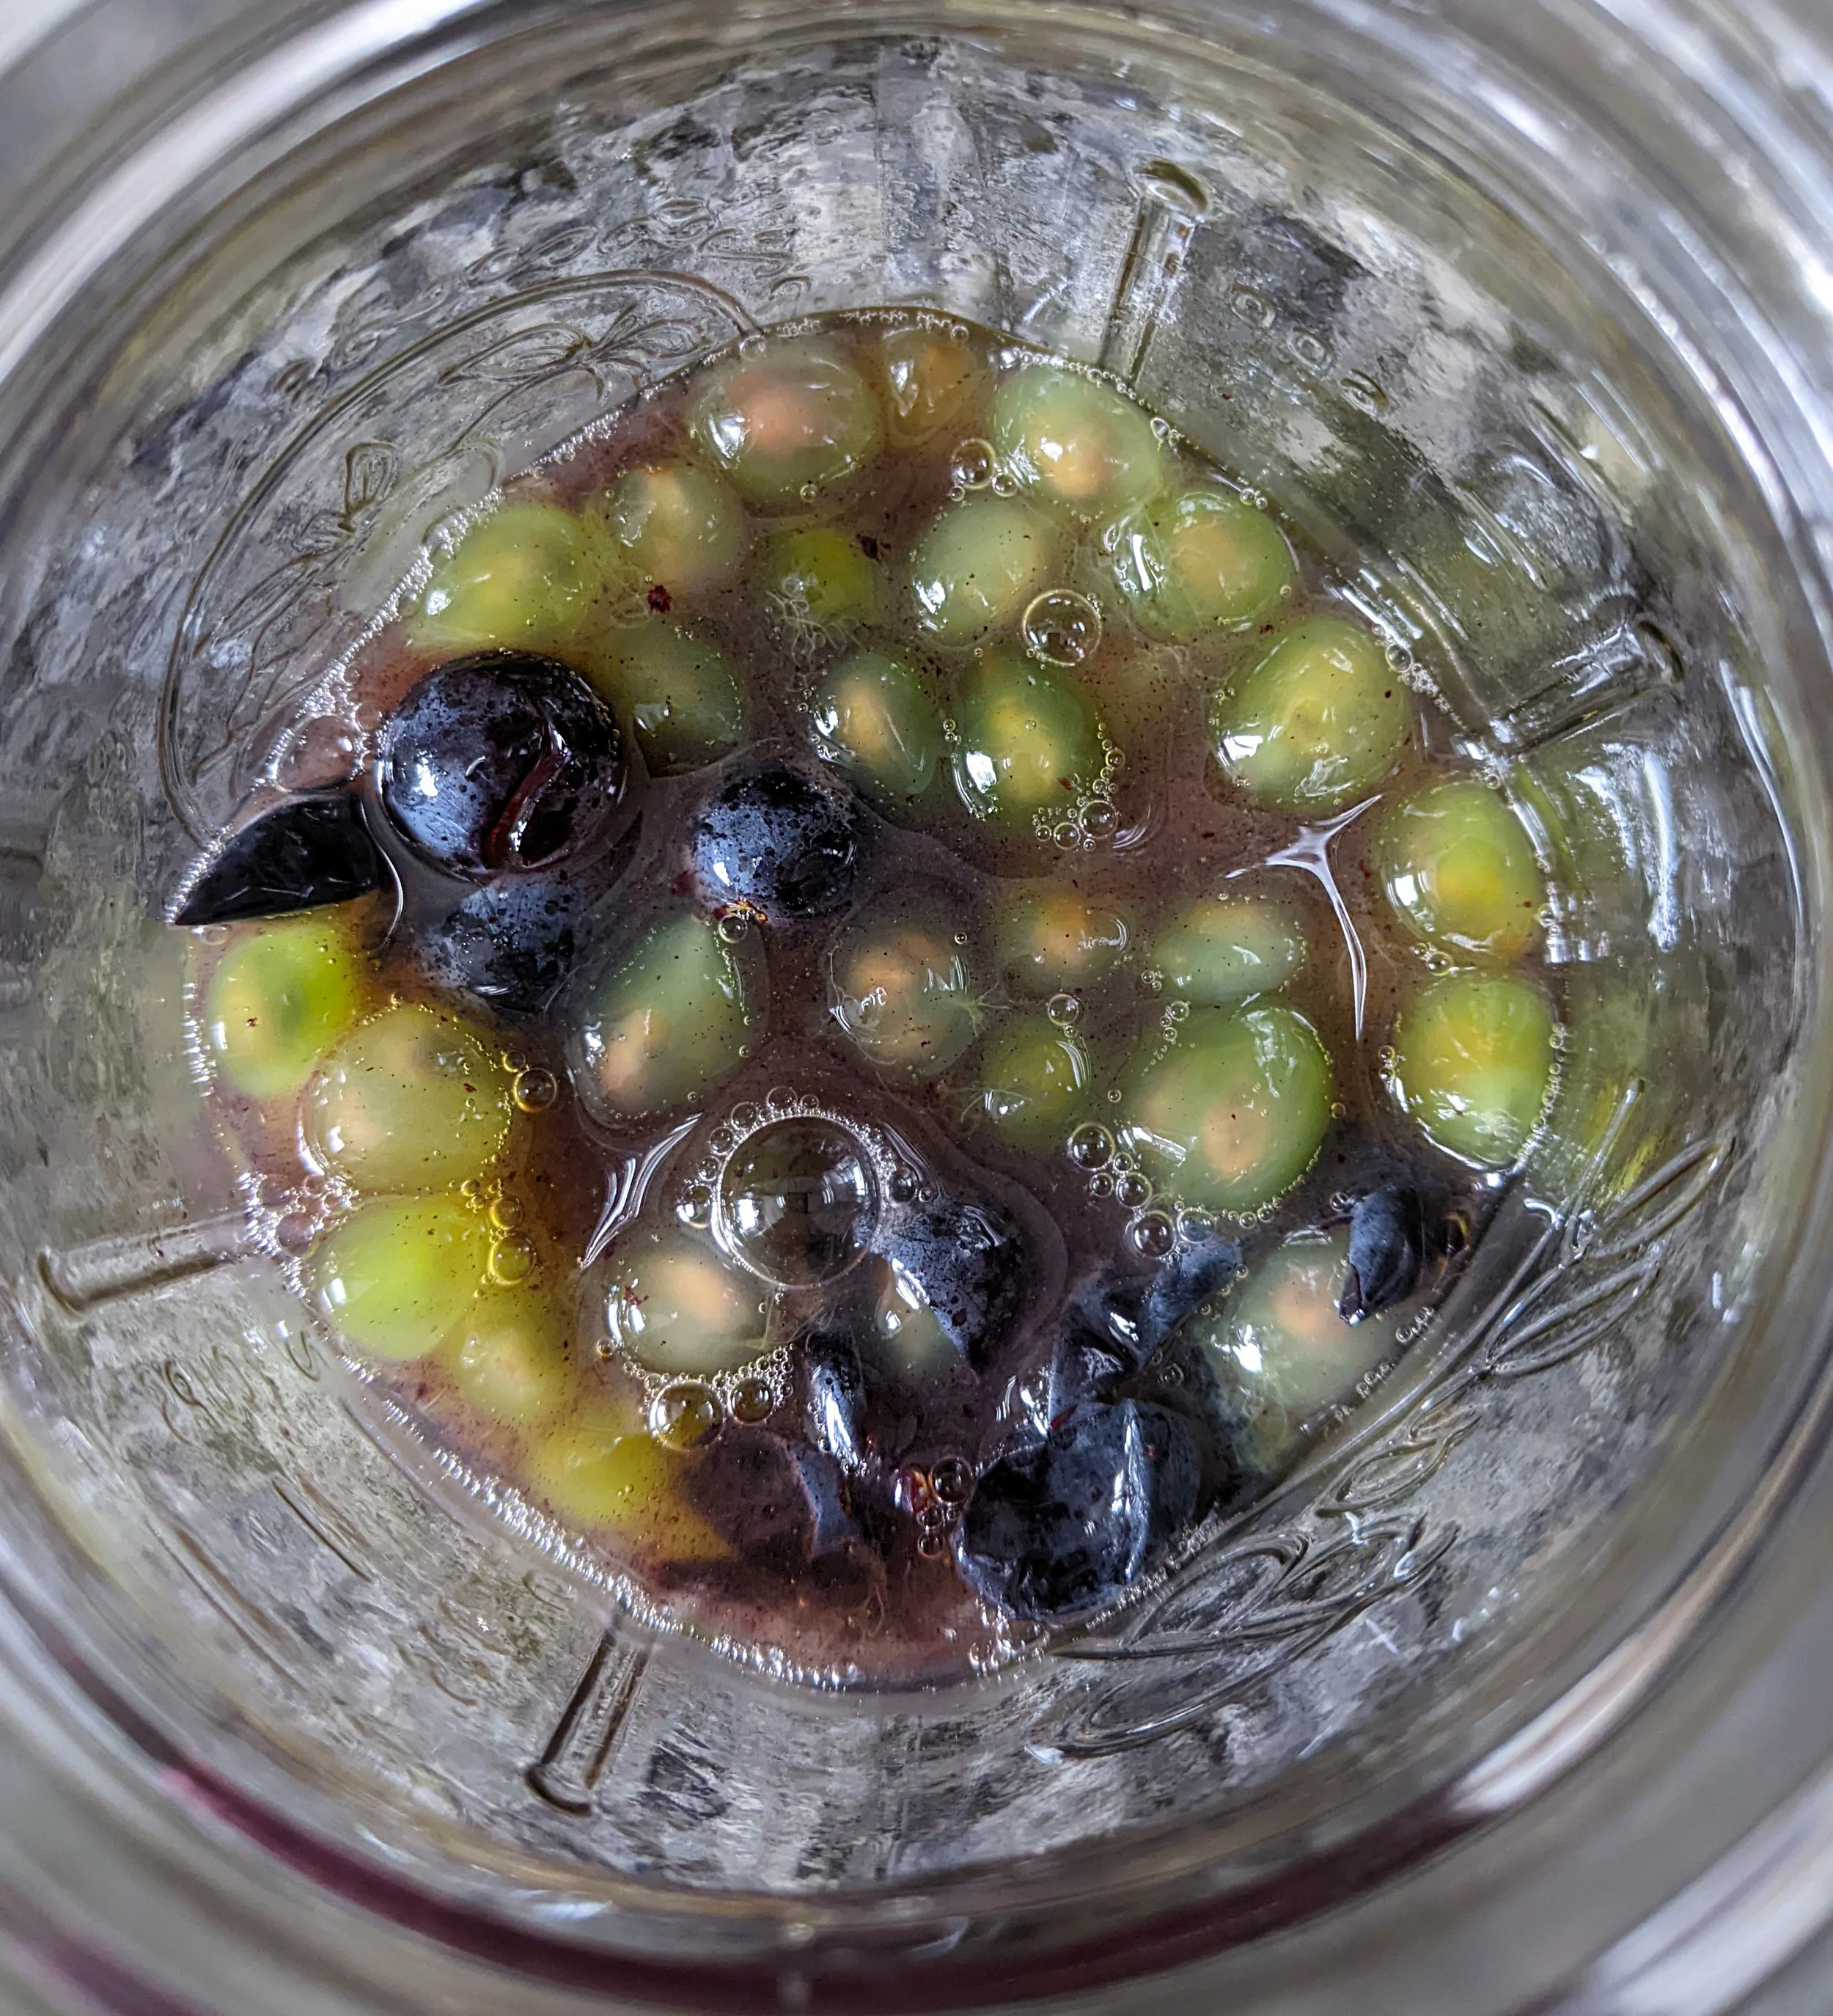
In a wide mouth quart jar, place your Concord Grapes and smash with a fork until the grapes let off some of their juice. Add your sugar and continue to smash the grapes, mix the grape juice with the sugars to dissolve. Fill the remainder of the jar with filtered water, leaving about an inch of headspace. Leaving enough room is very important when fermentation starts the grapes will rise up to the top of the jar!
Fasten the jar lid tightly and give everything a good shake, this is to ensure that all of the sugar is completely dissolved. The sugar is food for the natural yeast on the grapes and we want to make sure everyone gets fed.
Remove the lid and secure a piece of cheesecloth with the jar ring. Place in a cool dark cabinet, my favorite cabinet is an empty one in my dining room. The doors keep out all the sunlight and the cabinet sits on an outer wall so it stays rather cool. Let the grapes ferment for a week. Check your jar everyday for signs of fermentation and mold, we don’t want mold just pleasant bubbles. When everything starts working the grapes are going to float to the top from the carbon dioxide caused by the yeast. Just mix them back into the liquid to settle them back in. After day two, I ended up pushing the grapes back into the liquid, my yeast were very active right out of the gate, so be vigilant in your grape watch.
After a week is up, replace the cheesecloth with your lid. At this stage I found it necessary to keep everything contained. After the lid is replaced, continue fermenting for another week. Keep checking your grapes everyday to make sure there is no mold, push down your grapes and expel some of the trapped gas from the jar. The “burping” of the jar is important so your glass jar does not explode, yes the trapped carbon dioxide could actually break the jar and that would be the greatest tragedy not to mention mess.
When the two weeks are up, you should get a gentle whiff of alcohol that’s how you know it’s ready. Since your cabinet wine is ready it’s time to strain out all the grapes and pulp, they’ve done their job.
Take a clean jar and funnel lined with a coffee filter. Carefully pour the liquid and grapes into the funnel. Strain until there is no more liquid, this might take a little bit of time for all the liquid to pass through. My funnel was rather small so I had to strain my wine in batches. The worst thing is to overflow the funnel and lose your newly curated beverage.
Once everything is filtered you can store it in the jar or transfer to a Swing Bottle. Store in a dark and cool cabinet for at least 4 more days before enjoying.
*Note: When replacing the lid do not fasten it too tight. This will cause the wine to spurt when burping. No one wants fermented grape juice on their clothes.
During the 4 days after straining, make sure to burp your jar or bottle to release any trapped gas. The wine will continue to ferment after straining just not at the same rate. It will become stronger as more of the yeast ingest more of the sugars which results in a slightly drier wine. I like this particular wine on the sweeter side so I start consuming after the 4 days are up. I will usually drink this within the week as I regularly have wine with dinner. To slow the fermentation, store in the fridge. The wine should last for about a month stored in the fridge. I would still occasionally burp the jar even in the fridge.